DIY Bokeh Shape
So I finally came around to do this DIY Bokeh Shape tutorial which I planned to craft for a while 🙂
It’s really easy and took me about 30min to finish. It’s a nice Sunday afternoon craft to do.
So here’s what you’ll need
- Black cardboard
- Scissors
- Tape (preferable black)
- X acto knife
Step 1: Cut the cardboard
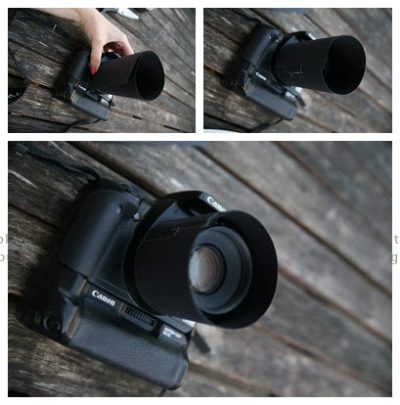
So let’s start by cutting the cardboard so that it will fit around your lens and tape it together. Make sure you don’t fi it too tight as it will hard to slide of.
Step 2: Tape together
Next you’ll cut out a circle in the diameter of you lens. I left some corners so it’s easier to tape on to your cylinder shape.
Using the x-acto blade, I cut slits into the circle so I can easily change the shapes. Now all you have to do is to tape it all together and cut out all the shapes you feel like. Unfortunately I don’t own any shape punchers so my heart and my star look a little wacky lol
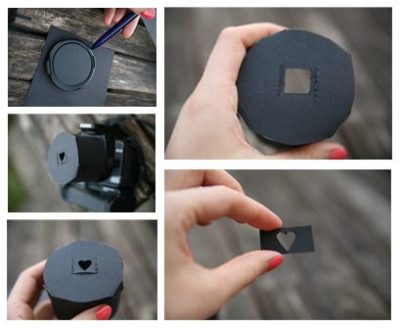
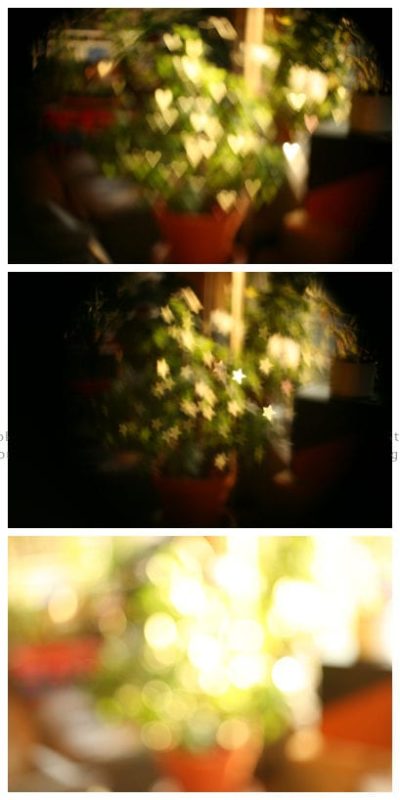
Make sure the size of your heart is big enough. At first I made it too small and I had a major vignette and a lot of light loss as you can see int the images below. The last one and the brightest one is just the lens without the bokeh shape but with the exact same settings. So you have to be aware of how much light you loose and set you’re camera accordingly.
Step 3: Experiment
Set your camera to its lowest aperture value (completely open). I used the Canon 50mm 1.8 so I used 1.8.
And now go out in the world and enjoy the endless possibilities of your new bokeh! Mother’s day is coming up and you could turn a heart shape bokeh picture into a handmade card by just printing it out 🙂

This little bug was interested in some crafting as well 😉