Wicked Witch of the West Selfie – Photoshop Tutorial
As you might know by now if you follow this Blog on the regular Halloween is coming up and that means it’s time for a new Photoshop tutorial.
Every year for Halloween I change my profile picture on social media. Last year I turned into a Skeleton. I also used Photoshop once to turn myself into a demon for Halloween. For Halloween 2015 I will transform myself into the Wicked Witch of the West from the Wizard of Oz. Also known as Elphaba, Theodora or Zelena. Actually Zelena from the TV show Once upon a time inspired me to create this Wicked Witch Halloween picture. I know you’re all waiting for the tutorial. So let’s start! It’s a super easy and fast step by step Photoshop tutorial.

In this tutorial I will show you how you can change your own selfie into a scary Halloween Witch image. You can even use it for invitations or hang it into a picture frame for a spooky decoration during my favorite season.
Wicked Witch of the West- Photoshop Tutorial
First of all I needed a typical witch hat. For that I used the Liquify option. I tend to use a smaller brush size to work more precisely. I varied the size between 80-130.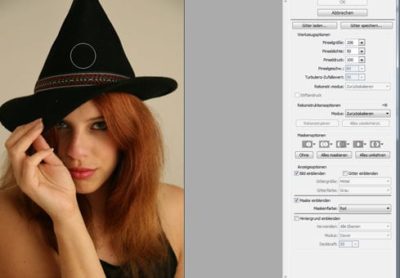
Just press the mouse and while keeping it pressed pull the hat upwards. I used the same technique to achieve the look of my long spiky finger nails.
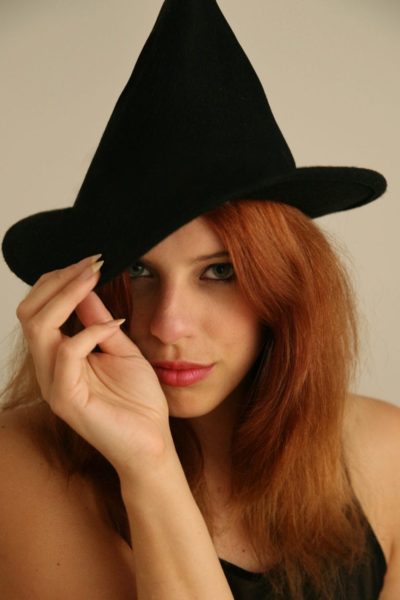
For the next part I used the stamping tool to remove the band on my hat. So it even looks more like a witch hat. That’s basically the most difficult changes. Everything else is super easy. I also didn’t retouch the skin as I figured if I turn it green anyway nobody will actually notice it.
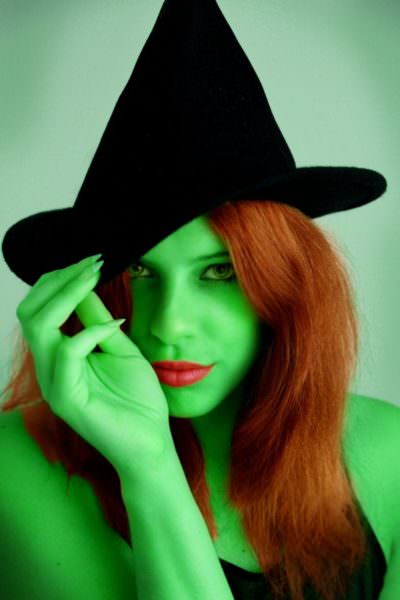
So far so good but my skin is not green yet. For that I used the Hue/Saturation tool and played around with the Hue until I achieved a nice poisonous green skin color. I ended up with a hue of +100. On an extra layer I used the eraser tool to remove the green color from my lips and hair so that there’s some more contrast in the picture.I also wanted to see if my natural blue eyes look better than the green ones but in the final picture I decided that the green was more fitting and changed it back.

It looked pretty good at this point but I was missing some contrast. To get a vignette on the edges you’ll need to use the dodge tool. Just slightly brush over the edges with an opacity of about 20. Afterwards I used the gradient tool to adjust the contrast to my taste and that’s it!
What do you think? Do you like it better before the contrast adjustment or after?
I hope you enjoyed this super easy and fun Wicked Witch Halloween Photoshop tutorial. Let me know if you have any questions.:)
That is so awesome! Love the green. How clever of you! Happy Halloween. Koko:)
Thank you Koko 🙂