Black Widow Costume DIY (The Avengers)
Spontaneously I decided to create a Black Widow Costume for Halloween. You know the Scarlet Johansson aka Natalia Alianovna Romanova, “The Avengers”, “Captain America”, “Iron Man” kinda one and not the spider version :p
It’s a really cheap DIY Halloween or Cosplay costume you can do in less than a day! I paid about 20$ for all of the Materials I needed since I had all the other things on hand. I bet you also have most of it already at home.
.
Black Widow Costume DIY
What you’ll need:
- Black Leotard
- Black Leggings
- Black Boots
- Matte Black Spray Paint
- Black Leather Fabric ( or finished Thigh Holsters)
- Bullet Belt
- Black Fingerless Gloves
- Toy Glocks
- Gray and Red Craft Foam
- Velcro
- Hot Glue Gun
- Black Sharpie
- Pencil
- Scissors
- Cardboard
- Optional Red Hair Wig or Spray Paint
I bought the Leotard, the Spray Paint and the Bullet Belt over Amazon Prime and it arrived the next morning. Lucky me! The other materials I had either already at home (like all the clothes) or I went to the craft store.
S.H.I.E.L.D. Patches
Ok so first let’s start with the S.H.I.E.L.D. Patches for the shoulders:
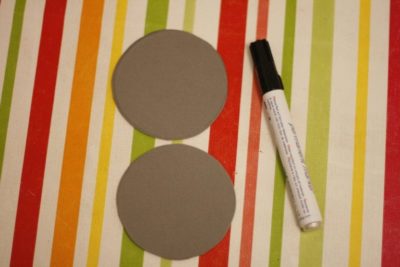
Find a glass which has about 3 inches in diameter to trace.
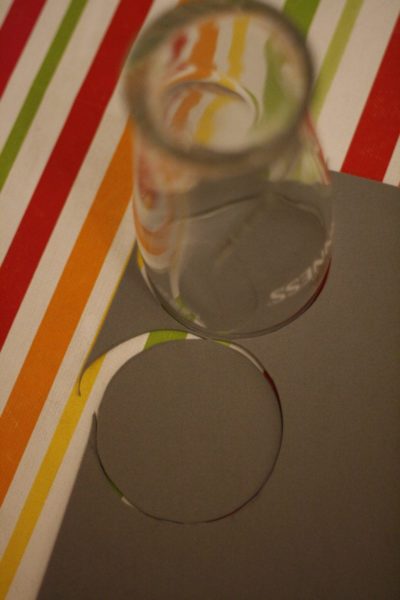
Trace two circles on the gray foam and cut them out using the Scissors. You can find the bird symbol online. I sketched it with the pencil first and then filled it in with a black sharpie.
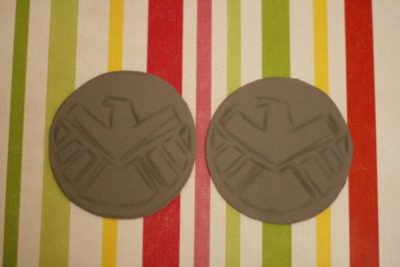
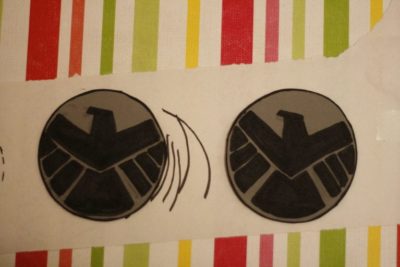
Tipp: When you do the second one the head should face the opposite side. ( I forgot about this while doing mine!) Outline the foam in black and you’re done. You could use a hot glue gun, Velcro, sew it or just use double sided glue tape to attach them to your Leotard. I used the double sided glue tape because I wanted to be able to reuse the Leotard after Halloween.
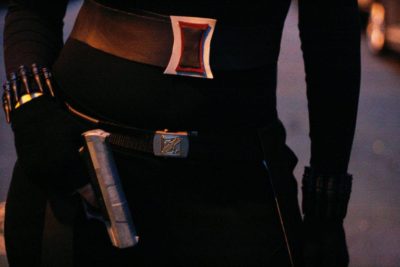
Black Widow belt
Next let’s continue with the Black Widow belt:
First I made a belt out of some Black Leather Fabric I had laying around and sewed some Velcro at the ends.
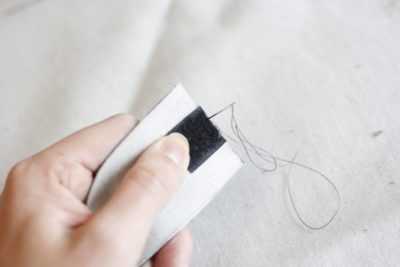
Create a curved hourglass figure with the grey foam. It should be slightly bigger than the belt. Create a smaller hourglass shape out of the red foam an repeat this step with the black foam. Hot glue all three pieces on top of one another. I used hot glue to attach it to my DIY belt as well.

Black Widow’s wrist cuffs
Remove enough bullets from the bullet belt to create whatever size bracelet you need. I used about 12 bullets each for my bullet bracelets.
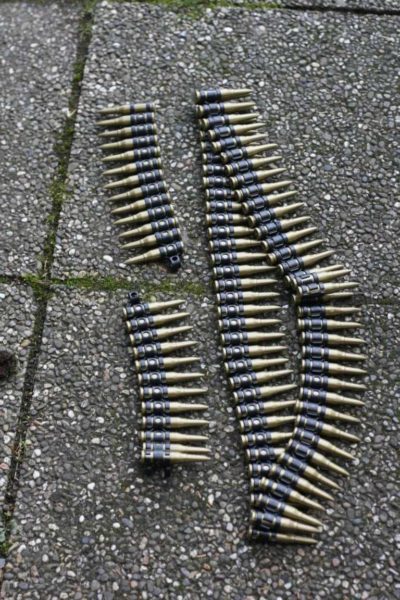
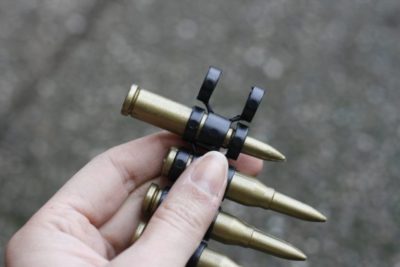
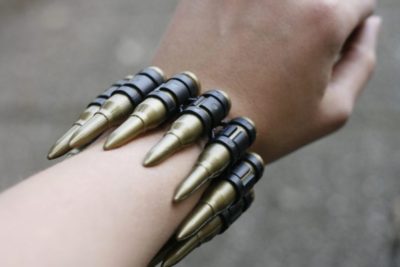


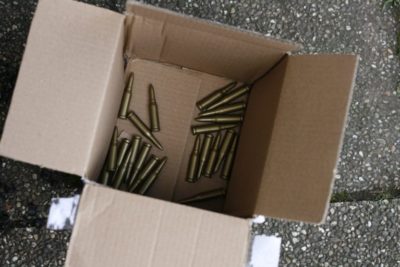

I separated all the bullets and used the matte black car spray paint to turn them black like the ones Scarlet is wearing in the Avengers movies. To be safe I put them into a cardboard box to avoid making a mess and staining the floor for eternity. Let them dry for about 45min to 1 hour before reassembling them.
Here’s a detail shot of the look.
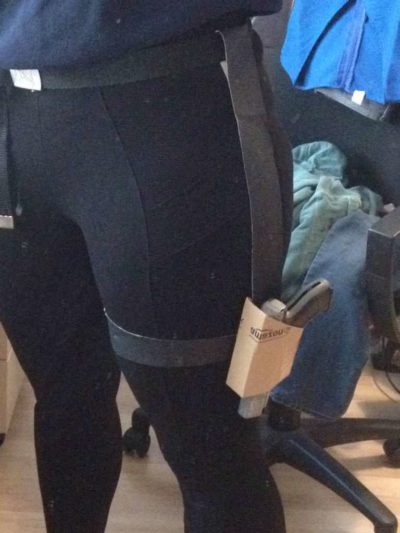
DIY Thigh Holsters
The tigh Holsters were a little tricky. First I cut two pieces of black leather so it would fit around my thighs.

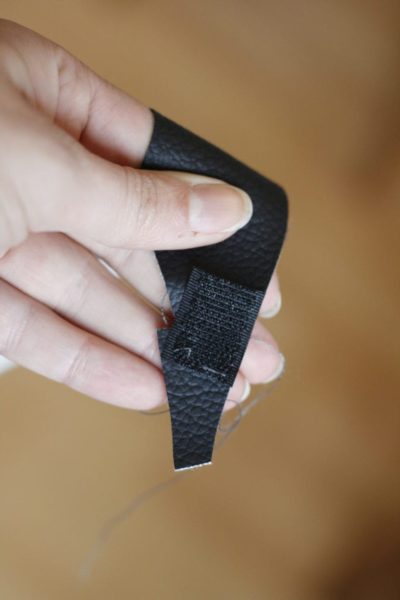
Here I used Velcor again to be able to easily attach and detach them from my legs.
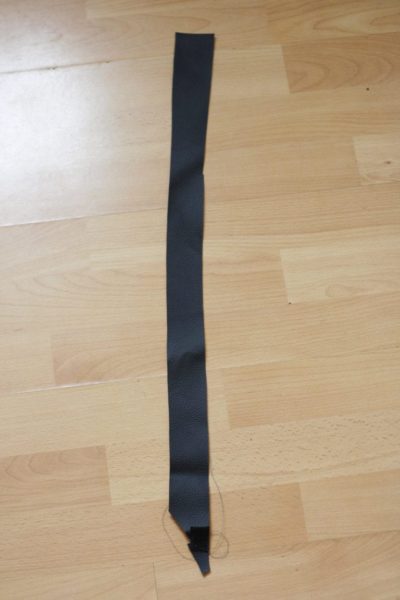
Now I needed two leather straps to attach it to my belt. Again I cut two about 2 inches wide leather straps.
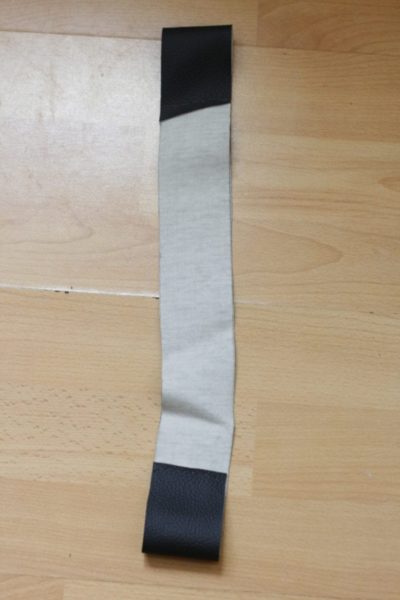
I made them a little longer than I needed them to be and sewed a loop at each end so i can just pull it through the belt and the thight straps.
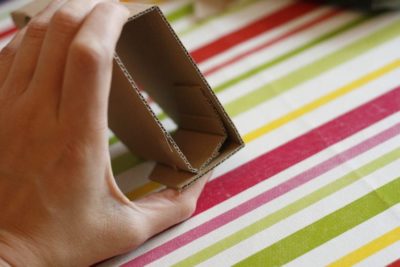
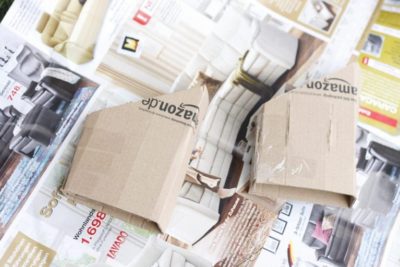
For the gun holster I used cardboard. Luckily as I mentioned above I ordered a couple of things over amazon and therefore had the cardboard on hand. By the way this post is not sponsored in any way. First I traced a triangular shape on the cardboard.
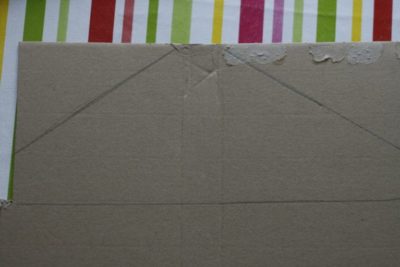
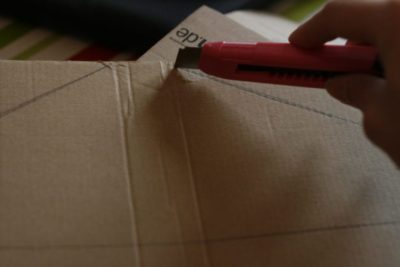
With an x-acto knife or cardboard cutter I cut out the piece.
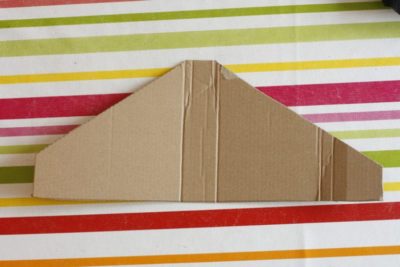
After that you have to fold it into shape.

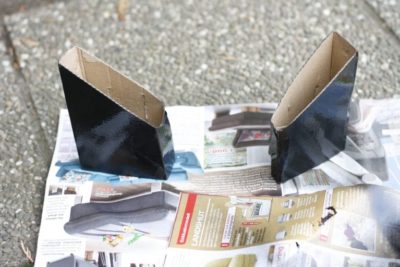
I used regular tape to keep it from unraveling but that wasn’t a smart choice as I found out during Halloween. It fell apart midway in the party. So I’d suggest you use duct tape instead.
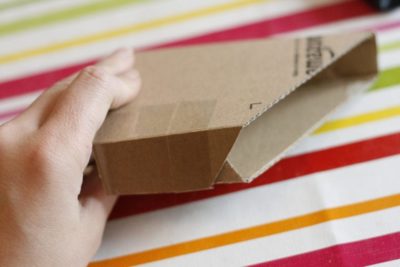
Now I had to fixade the tight holsters with the gun holsters. For that I cut two straight lines into the back of the cardboard pieces.


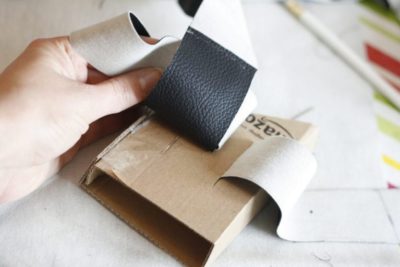
You can now just pull the fabric through the slits. Here’s a crappy Iphone picture because I didn’t take a better one from this the finished thigh holster. I’m terribly sorry…
I used the same matte black spray paint to color the cardboard black. Let it dry for about 1h before attaching the straps back on to it.
I did not want to buy an expensive wig so I opted for red hair spray paint for about 2,50 Euros. What a steal! I curled my hair over night with a technic I’m going to blog about at some point and than just used the whole can of spray paint. Here’s a candid shot of the party:

The Black Widow costume was a total success and people even recognized the movie heroine, Natalia Alianovna Romanova, I tried to represent.
Hey!
I love this costume and I’m definitely going to do that as cosplay, I just have a couple of questions. Could I just order leather fabric over Amazon? And how wide was the belt, would 2 inches be enough? And you said that you made 2 strips of both the thigh strap and the other strap, did I misunderstand that or why do you need two of each?
Your tutorial is super easy and cheap, I’m so glad I found it!
Lisa
Hi Lisa,
I’m glad you enjoy this tutorial. You sure can order some fabric. I was just lucky enough to have leftovers. Two inches sounds about right. But you can make it as wide as you like. I needed two strips each so I can make a holster for each of my legs. I hope this helps and I’d love to see the final result. Feel free to tag me on Instagram @wemustbedreamers. Thanks!
Thank you so much for this wonderful DIY
This has been so helpful! Thank you!
Glad it helped you!
Hope you had a fantastic Halloween! 🙂