DIY Halloween Blood Splatter Nails
So as you may have noticed I’m getting all excited for Halloween. Unfortunately we don’t really celebrate it here in Germany. (As we also don’t do Pumpkin Spice flavoured anything, which is making me super sad)
Well, enough said. I decided to get a little bit in the Halloween spirit with DIY Halloween Blood Splatter Nails. It’s a really easy but messy Nailart tutorial.
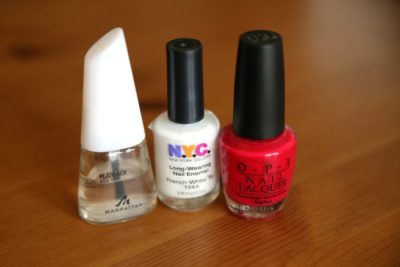
What you’ll need to create Blood Splatter Nails:
- Red Nailpolish
- White Nailpolish
- Top Coat
- slim straw
- surface that can get dirty
- Q-tip
- Nailpolish remover
Let’s make some Blood Splatter Nails!
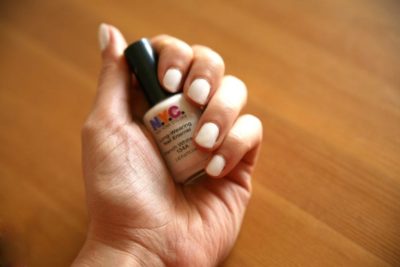
First you need to paint your nails white and let dry. I did two coats.
Now the messy part starts. You can use tape to cover the skin around your nails. Wrap it around the finger just under the cuticle. Taping could make the cleanup much easier. But well I was lazy and just cleaned it up with a Q-Tip.
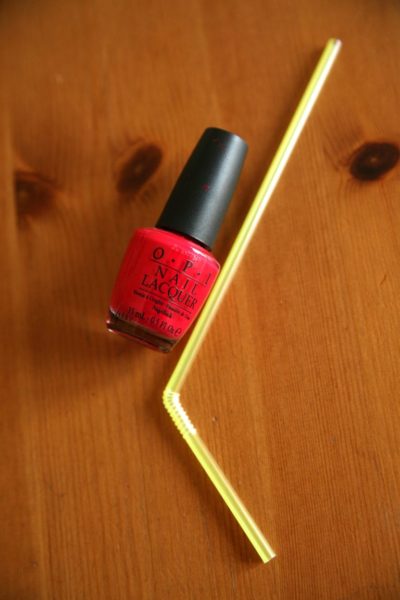
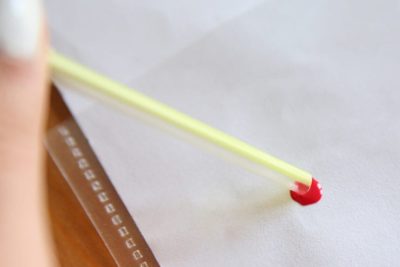
Now you need the red nailpolish and the straw. Try to pick a really skinny straw. It will make it easier to control the splatters that way.
As to the nailpolish you will use a lot of it so don’t use your favorite or most expensive one. It would be just a waste. The O.P.I. polish I used was a little too thick so I mixed it with a little bit of nailpolish remover to thin it out.
I used some clear plastik cover to put the nailpolish on. You can use whatever disposable surface you prefer. Just make sure you work on a surface that is easy to clean afterwards.
Place a little dot of the polish on the surface and dip the straw into it. With your nail above the surface, place the straw about 2 inches away from your nail. Make sure a film is covering the entire end of the straw. You have to act quickly before the nailpolish drops or dries. Use a quick breath to blow the polish onto your nail.
Sometimes too much red got onto my nail. So I just cut a piece off of the straw and dipped it into some white nailpolish and blew it over the nail again to even things out a bit.
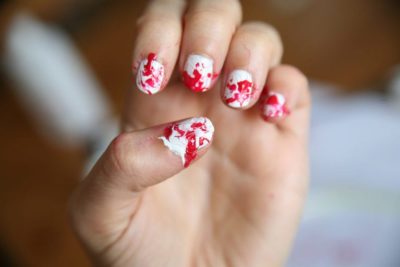
This is what I ended up with. I probably should have used tape but oh well…

I used 4 Q-Tips to clean up the mess. It wasn’t as hard to remove as I expected first. I was done in about 10 Minutes.
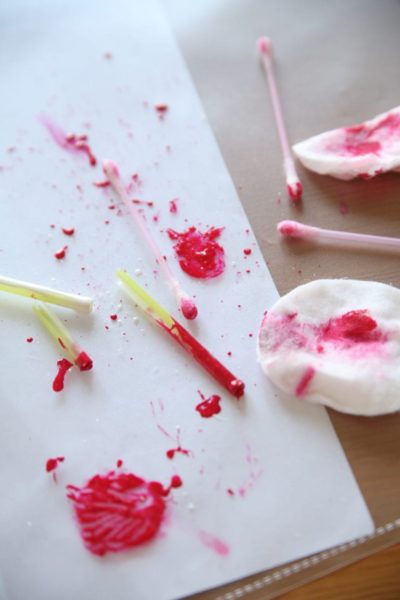
It gets really messy! I can’t mention often enough how important the surface is. Above you can see the mess I made.
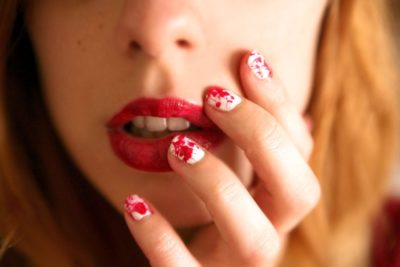
Now enjoy your Blood Splatter Nails!
I couldn’t help myself but add some fangs to the first pic to make it look more spooky. If you’re interest in finding out how to add fangs to your pictures, let me now and I’ll whip up a tutorial for you! I used the same fang technique for my daemon portrait.
Happy too early Halloween everyone!

The first time I did splatter nail art, I laid down a sheet of wax paper. It made clean up really easy!
Banana phobia that’s a really smart idea! I will try that next time I do splatter nails 🙂 thank you for the tip!